Type in key words and search my blog here:

Loading
Showing posts with label Post Options. Show all posts

Wednesday, June 24, 2009

Scrapping Older Posts, etc.

Resource: Pocket at Blogger Help

Discovered on Kathy’s Blog Just Being Crafty

I am trying something new. I found a very cool site called Jing Project that allows you to video and narrate onscreen instructions. I created this video tutorial in Jing, but I must warn you there is only 5 minutes, so it’s very fast (well if it plays straight through...LOL). Also make sure you use your scroll bar on the side to move the video up/down and right/left as the capture video I did was quite large. I did not make any retakes, so for what it’s worth, you are welcome to view the video by clicking on the image below, and when the link opens click on the start arrow:

Video Lesson 1 - Scrap your Older Posts, etc

Step 1 - Create your image

Create an image (GIF, JPG or PNG). My OLDER/NEWER/HOME buttons are in PNG format, because I prefer the transparent background. Make sure your images are no larger than the following:
110 pixels in width (96 dpi) I always make mine much larger such as 1100 x 1100 pixels 300 dpi and resize for clarity.

Step 2 – Upload your finished image Upload your finished image to your favorite photo hosting site and get the direct link code. I like Photobucket and Scrapbookflair. Add these codes to your planning document, by inserting them as the DIRECT IMAGE LINK in this code:

<img src='DIRECT IMAGE LINK'/>

Planning Document

Step 3 – Backup your blog template.
You can find directions to do that here.

Step 4 – Change your HTML code.
Go to CUSTOMIZE/LAYOUT/EDIT HTML and check the EXPAND widgets box.

OlderPostsDirections 1

You will be looking for and replacing 3 pieces of code (one for each link in your blog NEWER POSTS, OLDER POSTS and HOME. One of my favorite key strokes are the CTRL+C (copy) and the CTRL+V (paste). You can highlight and copy and paste for each section.

{SAMPLE INSTRUCTIONS}

A. Highlight <data:newerPageTitle/> with your cursor, and then click the CTRL+C (COPY) keys together.

B. Go to the HTML, and press the CTRL+F (FIND) keys and then put your cursor in the box, and hit your CTRL+V (PASTE) keys and you will paste the code you are looking for into the box.

C. Go to your planning document and CTRL+C copy the <img src='DIRECT IMAGE LINK FOR NEWER'/> with your actual link in the code.

D. Go back to the HTML and replace the <data:newerPageTitle/> and replace it by highlighting it an using your CTRL+V paste keys.

E. Do the same step for each portion of the code.

You will find and replace <data:newerPageTitle/> with the digital image you scrapped for newer (next) posts {See SAMPLE instructions above}

You will find and replace <data:olderPageTitle/> with the digital image you scrapped for older (previous) posts

You will find and replace <data:homeMsg/> (only the first one) with the digital image you scrapped for home

Step 5 – PREVIEW your blog.
Because you are only seeing the first page of your blog, you will have to trust that the NEWER and HOME buttons are working if the OLDER POSTS button is visible.

Step 6 – Save Template and View your blog.

Changing older posts 2.doc

Find the Word Document Instructions HERE.

Here’s to more happy scrapping, and
Hugs from the heart,
Jeanette

Saturday, June 20, 2009

Any font for post titles

Request by: Cara at Sweet Tomato Designs and Monica at il mondo di Monica and Faye at Angels that Scrap

I reviewed these directions and I felt that I could not re-write them better than Amanda does on her website. So I direct you to

image

Kevin and Amanda’s blog (image is linked). They have a wonderful and creative website. You can find detailed directions there. I'll be honest, it was WAYYYY over my head, and I really like the background for post titles better. You can learn how to do that here.

Here’s to more happy scrapping, and

Hugs from the heart,

Jeanette

Saturday, February 7, 2009

Windows Live Writer

I am learning some fun new tips about posting on blogger. This is my first practice post with WLW. After I check it’s success (or not…LOL) I will post about how to use it! One tool that really interested me (because of all our scrapping and photos) is the simplicity of adding photos…and so here’s my first attempt:

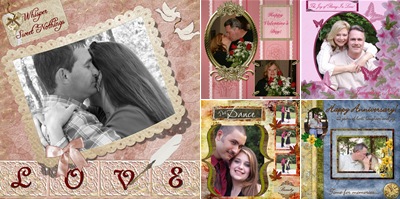
Here are few of my favorite “love” scraps:

Guess what? I didn’t have to pick up my photo from the top and move it where I wanted it…isn’t that great?

Here’s the link for this free program: Windows Live Writer

Some things I’ve noticed:

1. The post title icon does not show up on the preview, but did after posting!

2. The signature did not show up, but it was easy to add as photo, and you could add a PNG (transparent file) and you could also resize it, and choose no border around it…I really like that.

As I learn more about it, I will share!

Monday, February 2, 2009

Scrap you Post Title Icon

I saw a cool post made by Pocket about making an icon for your post titles. I was intrigued, and set about to learn how to do it.

Step 1 - Create and upload your image
Create an image (GIF, JPG or PNG). My POST SEPARATOR is in PNG format, because I prefer the transparent background. Make sure your images are no larger than the following:

75 x 75 pixels (72 dpi)
OR 50 x 50 pixels (72 dpi)

As always, I scrap the image much larger, then resize. For this I scrapped at 1000 x 1000 to begin with. Upload your finished image to your favorite photo hosting site and get the direct link code. Save it for later.

Step 2 – Backup your blog template.
You can find directions to do that here.

Step 3 - Check your font size and boldness
You can check out how to change your post title size here.

Step 4 – Find this section of your HTML code.Go to CUSTOMIZE/LAYOUT/EDIT HTML Make sure to Expand Widgets

Look for this section of code

<b:if cond='data:post.url'>
<a expr:href='data:post.url'><data:post.title/></a>
<b:else/>
<data:post.title/>
</b:if>

***Hint: The fastest way to find it is to hit the CTRL and the F (FIND OPTION) to open a search box to find what you need in your code. You can search for the expr part of the code, there are a lot and some that are similar so please check CAREFULLY.

You are going to put your code BETWEEN the <a expr:href='data:post.url'> AND the <data:post.title/> code.

Step 5 - Change your HTML code.
Paste this script between the code text listed above:

<img src="DIRECT IMAGE LINK HERE" style="border-width: 0px;" />

Click on PREVIEW, and look at your post. Do you like the Icon you've created? If so, then click SAVE, and VIEW BLOG. If not, make changes as needed. If you have any questions, please feel free to contact me.

Saturday, January 31, 2009

POST HTML

Many of you scrappers out there know that it is difficult to post HTML code directly on your blog without changing some of the symbols. This can be very time consuming! Well, here's the EASY WAY...it's called an encoder! That's right, if you need to post your blinkie or other HTML code, you can put your code into the Centricle link here, and press the ENCODE button, and you have script ready to be posted.

Update 06/17/2009 - If you use Windows Live Writer, you do not have to encode your HTML, it will do it for you. Another reason I love WLW!!!

Sunday, January 25, 2009

SCRAP YOUR SIGNATURE

At the request of Audrey at My Tiny Truths blog, here's how you make a simple change to add a signature or scrap a signature to be automatically included in every post. As always, if you have any questions, please feel free to contact me.

Step 1 – Create your signature
Scrap a signature with whatever dimensions you choose. I scrapped mine at 700 x 177 pixels and 300 dpi. This is extremely large so, when you use the code, you must resize to a smaller unit WITHIN THE CODE itself. This is definitely best if saved as a PNG (transparent to allow your beautiful background to show through ;o)

Step 2 – Upload your image
Upload your image to your favorite photo hosting site and get the direct link. Save the link.

Step 3 – Format your post
Go to CUSTOMIZE/SETTINGS/FORMAT and scroll down to the bottom where you will see POST TEMPLATE. Here you can add just text or you can add your scrapped image.

Paste the following code in the POST TEMPLATE, making sure to ADD your direct image link, AND making sure to use your dimensions (or reduced dimensions) where the code says WIDTH and HEIGHT. You can also choose LEFT, CENTER, OR RIGHT. Most signatures are left so I chose that as my sample.

<div></div>
<img style="FLOAT: left; MARGIN: 0px 10px 10px 0px; WIDTH: 300px; CURSOR: hand; HEIGHT: 76px" alt="" src="DIRECT IMAGE HERE" border="0"/>


Step 4 – Save Settings
Save your settings and view your blog. The <div><div> part of the code is to give you the space you need to begin typing your post. The signature will move down as you type.

Step 5 – Practice
Write a new post with your new signature, and please be sure to write and INCLUDE your BLOG ADDRESS so we can all celebrate your success with you!


Tuesday, January 20, 2009

Scrap a post separator

We have a winner in my recent poll! 81% voted to learn how to create an image as a post separator. To the best of my ability, here are the directions! As always, if you have any questions, please feel free to ask!

Creating a POST SEPARATOR
Step 1 - Create and upload your image
Create an image (GIF, JPG or PNG). My POST SEPARATOR is in PNG format, because I prefer the transparent background. Make sure your images are no larger than the following:

400 x 50 pixels (96 dpi)

Upload your finished image to your favorite photo hosting site and get the direct link code. Save it for later.

Step 2 – Backup your blog template.
You can find directions to do that here.

Step 3 – Delete the dotted lines between posts.
Go to CUSTOMIZE/LAYOUT/EDIT HTML and use your CTRL F (hold the control key and the F key together) to FIND the word dotted, and delete it. You should find the word twice in your code. Preview to see if the dotted line between posts is gone. Click Save Template.

Step 4 – Change your HTML code.
Go to CUSTOMIZE/LAYOUT/EDIT HTML and look in the * / Footer section for a piece of code that has ]] > </b:skin> in it. You will place the following code with your image link in it right BEFORE this code, and after the } symbol. See the following screen shots.

.separator {
background-image: url(LINK OF YOUR IMAGE);
background-repeat: no-repeat;
background-position: center center;
height: 50px;
padding: 4px;
}

Click Save Template.

Step 5 – Change your HTML code again.
This has to be two separate steps. I’ve tried to make it one step and it doesn’t work. Make sure you click the EXPAND WIDGETS box, or you will not be able to find the code.

Find this part of your code in your HTML:

<p class='post-footer-line post-footer-line-3'/>

The fastest way to find it is to hit the CTRL and the F (FIND OPTION) to open a search box to find what you need in your code. You can search the number 3 to find it. There are a lot of 3’s so make sure you find the code in its entirety.

Paste the code below immediately AFTER the this line :

<div class="separator"></div>

Save Template. View Blog.

Here are the WORD DOCUMENT INSTRUCTIONS.

Here’s to more happy scrapping, and
Hugs from the heart,
Jeanette

Wednesday, January 14, 2009

BOLD POST TITLES!

POST TITLES GIVE A SHOUT OUT!

Angelfaye Designs asked if we could make POST TITLES bolder and bigger. And the answer is, "YES, we can!" Thank you Blogger Help. Now you can make a shout out with your POST TITLE!

Step 1 – Back up your blog. You will find instructions here.

Step 2 – Change the HTML code.
Most of our blog templates have a pattern of code sections similar to the following:
HTML Sections
Version
Blog Template Style (mine in Minima)
Variable Definitions
Body
/* Header
-----------------------------------------------
/* Outer-Wrapper
-----------------------------------------------
/* Headings
-----------------------------------------------
/* Posts
-----------------------------------------------

*/
h2.date-header {
margin:1.5em 0 .5em;
}
.post {
margin:.5em 0 1.5em;
border-bottom:1px $bordercolor;
padding-bottom:1.5em;
}
.post h3 {
margin:.25em 0 0;
padding:0 0 4px;
font-size:200%;
font-weight:bolder;
line-height:1.4em;
color:$titlecolor;
}
/* Comments
----------------------------------------------- */
/* Sidebar Content
----------------------------------------------- */
/* Profile
----------------------------------------------- */
/* Footer
----------------------------------------------- */
Widgets

To change the font size and weight, we have to go to CUSTOMIZE/LAYOUTS/EDIT HTML. If you have backed up you template, you are ready. We are focusing on the /* Posts section of the code. We will scroll down to this section of the code and change the font size and font weight. Each template varies, so you will need to experiment with varying sizes (increase the percentage) and weights (you have a choice of normal, bold, bolder or light). You will need to PREVIEW your blog to see if you like the look of your new POST TITLE. Continue trying various sizes and weights to get the look you want. I settled on a font size of 200% and a font weight of BOLDER for my POST TITLES.


Make the changes as indicated in the screen shot below. Preview, if you like, select save.

Here’s to more happy scrapping, and
Hugs from the heart,
Jeanette
Saturday, January 3, 2009

Help others snag your blinkie!

So you want others to SNAG YOUR BLINKIE, and post your blinkie on their blog, AND you want to give directions for others to snag it. Let's start with first things first.

Step 1 - Create your blinkie
1. Create your blinkie. You can find some very simple directions here.

2. If you create your blinkie with Picason, then make sure to save your Image URL code. You will need this later. If you don't use Picason, then make sure to upload your image to a photo hosting site. See sidebar for some photo hosting site options.

Step 2 - Write a post
1. Write a post about snagging your blinkie. Back date if you want so that it's not on the front page of your blog. You can backdate a post by going to POST OPTIONS at the bottom of the gray bar around your post. There you can choose any date, past, present or future to post your blog. This is how bloggers pre-publish their blogs.
2. When you want to post HTML code on your blog, you have to substitute some of the code with a special combination of letters so that blogger doesn't freak out and delete your code or truncate (shorten) your code. For example it, you can't post a less than (<) or greater than (>) sign on blogger. Click here for a HTML site (chart is at the bottom) that has a lot of common code substitutions. I usually use the number substitution, but sometimes have to try different ones for the less than and greater than signs.

3. With the substitutions in place, you can copy and paste the following as your post:

Thanks for snagging my blinkie. To easily add my blinkie (with a link to my blog) to your blog, just go to your blog, and Select LAYOUT, then choose PAGE ELEMENTS. From there select ADD A GADGET. Add HTML/JavaScript, then input the following code:

PUT YOUR BLOG NAME HERE

3. After you have published your post, then click on the title of the post, and you will be directed by Blogger to that post. You will also see in your browser that your blog post has its own address line (link). Save that link, we will call this the DIRECTIONS TO SNAG MY BLINKIE LINK.

Step 3 - Post your blinkie on your site
1. Go to your blog, and Select LAYOUT, then choose PAGE ELEMENTS. From there select ADD A GADGET. You will choose add a picture as your option. The nice thing about Blogger is that now you can link your picture. For the LINK part, put in your DIRECTIONS TO SNAG MY BLINKIE LINK. For the IMAGE part, you will add your Blinkie Image URL or direct link from the web.

After this lesson you should be able to make your blinkie, post it to your blog (with your link) and give directions for others to snag your blinkie. As always, if you have any questions, just click on my "Contact Me" button in my header.

Here's to more happy scrapping, and
Hugs from the heart,
Jeanette

ONE SIZE TEMPLATE

ONE SIZE TEMPLATE
Blog Background Template